Python Robot Programming: Code a Vacuum Robot Step by Step
Everything a robot does comes down to one sentence: read the sensors, decide, set the wheels — then do it again. This tutorial walks you from an empty file to a competitive cleaning algorithm for the Smart Home League vacuum robot, with complete Python you can paste into the app and run.
No previous robotics experience is assumed. If you can write an if statement and a
while loop in Python, you already know enough to finish this page. Everything else —
sensors, headings, coverage strategy — is explained as it comes up. If you have not seen the
competition itself yet, read what the vacuum robot league is first,
then come back here.
Before line one: the setup
You need one thing: the league app. It already contains the house, the robot, the sensors, Python and the lessons, so there is no simulator to install, no Python version to match and no library to add.
- Windows — SmartHomeLeague-Windows.exe, double-click it.
- macOS — SmartHomeLeague-Mac.zip, unzip it, then right-click the file inside and choose Open.
Step-by-step screenshots are in the install guide. Inside the app the parts that matter to you are:
| Path | What it is |
|---|---|
| Base code button | The starter program for the division you picked — your starting point, commented line by line |
| Match mode | Where you load code, press Start and watch the score |
| Sensors toggle | Shows every sensor value live while the robot drives |
| Tutorial | Seventeen lessons, in Persian and English, from the first move to your own functions |
To get a robot moving: open the app → pick your division → Match mode → press Base code → press Start. The robot starts driving. Now you can start changing what it does.
The mental model: your code is a loop
This is the single idea that makes robot code click, and the one beginners fight the hardest. Your program is not a story that runs from top to bottom once. It is a short block of code that the simulator runs over and over, ten times a second. Each pass is one "moment" for the robot: it looks around, thinks for an instant, and moves the wheels a tiny bit.
Written out, one moment looks like this:
- Read — what do the distance sensors say? Which way am I facing?
- Decide — is anything in the way? Should I keep going, veer, or spin?
- Act — set a speed on the left wheel and a speed on the right wheel.
That is the whole job. Every clever cleaning algorithm in this article is just a different answer to step 2. Here is the smallest controller that compiles and runs — the skeleton every later example is built on:
The empty control loop
# This whole file IS one moment for the robot.
# The app runs it again ten times every second.

wheelleft = 0 # speed of the left wheel (-25 .. 25)
wheelright = 0 # speed of the right wheel (-25 .. 25)
There is no loop to write and nothing to import. Your file is the body of the loop, and the
app is what repeats it — ten times a second, from the first line to the last. Because it runs
ten times a second, 10 passes is exactly one second: that is the unit you count in.
The most important consequence
Your robot cannot wait. There is no time.sleep(1). Your file has to end so the
app can run it again; if you loop inside it, the robot freezes with the wheels stuck at
whatever speed they had.
The fix is a counter that survives between passes. To turn for two seconds you set
timer = 20 (because ten passes make one second) and subtract one every pass until it
reaches zero. You will see this pattern in almost every example below — it is the robotics
version of "remember what I was doing". timer = seconds(2) does the same thing and
reads better.
Making the wheels turn
The robot has two driven wheels, one left and one right. You never say "go forward"; you say "left wheel at this speed, right wheel at that speed", and the difference between the two is what steers:
| Left | Right | Result |
|---|---|---|
| +full | +full | Straight ahead at top speed |
| −full | −full | Straight backwards |
| +full | −full | Spin clockwise on the spot |
| −full | +full | Spin anticlockwise on the spot |
| +full | +half | A gentle curve to the right |
Grabbing the motors and driving forward
# Drive straight ahead, for ever.
MAX_SPEED = 25 # the fastest a wheel can turn

wheelleft = MAX_SPEED
wheelright = MAX_SPEED
That is the entire program. Two numbers, and the robot moves. Setting them to different values
makes it curve; setting one negative makes it spin on the spot. There are also ready-made moves
for the common cases — forward(2), backward(5), turnleft(1),
turnright(1), stop(2) — where the number is seconds.
Reading the 8 distance sensors and the IMU
In the First Step and U14 divisions the robot carries eight distance sensors arranged around its body, plus an inertial measurement unit (IMU) that works as a compass. U19 adds a GPS and a battery on top of those. That is the robot's entire view of the world — there is no camera, no map, and no list of where the furniture is. Everything your algorithm knows, it has to work out from these numbers.
Think of the eight sensors as a ring, each one staring outward:
The sensor ring, seen from above
 ds0 ds7 <- front
 ds1 ds6
 ^
 ds2 (robot) ds5
 ds3 ds4 <- back
Do not take that drawing on trust. Confirm it yourself, because index order is the kind of detail that quietly ruins an afternoon: drive the robot slowly at a wall and watch which numbers move. Two more things you must discover before writing any logic:
- Which direction does the number go? Some distance sensors return a raw intensity that rises as an obstacle gets closer; others return a distance that falls. Both are normal. Print the values, walk the robot up to a wall, and look.
- What counts as "close"? There is no universal threshold. Note the value with clear floor ahead and the value just before a collision, and pick a number between them. That single constant will be the most-tuned line in your controller.
The IMU answers a different question: which way am I facing? Its yaw angle comes back in radians between −π and +π. Convert it to degrees when you want to read it, but keep radians inside your maths.
The measuring tool: enable everything and print it
# Every sensor is simply a variable. Nothing to enable, nothing to read out.
#
# front distance straight ahead, in centimetres (smaller = closer)
# frontleft the same, ahead and to the left
# frontright the same, ahead and to the right
# bumperfront 1 when the FRONT half of the bumper ring is touching
# bumperback  1 when the BACK half is touching
# bumper      1 when either half is
# color the colour of the floor just ahead
# heading which way the robot faces, 0..359 degrees (U14 and U19)

if front < 40:
 turnleft(1)
else:
 forward(1)

 if step % 10 == 0: # ~3 lines a second, not 30
 print(values, "heading", heading)
Run this, then drag the robot around the scene with the mouse while it prints. In two minutes you will know your sensor layout, your near/far numbers and which compass heading corresponds to which wall. Every hour spent here saves three hours of confused debugging later.
Two traps with sensors
Guessing the threshold. "Close" is not a feeling, it is a number. Turn on the
Sensors panel in the app, drive the robot up to a wall by hand and read what
front actually says at the moment you would want it to turn. Use that number.
Forgetting the units. The distance sensors report centimetres, and a
smaller number means closer — the opposite of what most beginners assume the
first time they write if front > 40.
Your first real controller: drive and turn at a wall
Here is a complete, working controller. It drives forward, and when the front sensors see a wall it
reverses slightly and spins for a fixed number of passes before carrying on. Everything in it you have
already met: the file that runs ten times a second, the counter that survives between passes,
and a chain of elif branches where the first true one wins.
Controller #1 — forward until something blocks the way
# Controller #1 - drive, and turn away from whatever blocks the way.
# Remember: this file runs ten times a second, so 10 = one second.

NEAR = 40 # centimetres. "A wall is close." Find YOUR number
TURN_STEPS = 7 # how many passes the spin lasts (7 = 0.7 s)

if timer > 0: # 1) still finishing the previous turn
 timer -= 1
 wheelleft, wheelright = 25, -25

elif front < NEAR: # 2) wall dead ahead -> spin away
 timer = TURN_STEPS
 wheelleft, wheelright = -10, -10

elif frontleft < NEAR: # 3) something on the left -> veer right
 wheelleft, wheelright = 25, 8

elif frontright < NEAR: # 4) something on the right -> veer left
 wheelleft, wheelright = 8, 25

else: # 5) clear road -> full speed
 wheelleft, wheelright = 25, 25
Three details worth pausing on, because they generalise to every controller you will ever write:
- The turn check comes first. If the "am I busy?" branch were at the bottom, a wall directly ahead would restart the turn on every single pass and the robot would grind against it forever. Unfinished business is always checked before new business.
- Check all three distance sensors.
frontalone leaves a blind spot the size of a chair leg: a wall met at an angle is seen byfrontleftorfrontrightlong before it is seen straight ahead. - Always turn the same way. The code above always spins one direction at a wall. Alternating left and right based on which sensor fired feels smarter but produces a robot that wobbles in a corner and gets stuck. Steady beats clever.
Press Start and watch. You now have a robot that cleans — badly, but genuinely. Everything from here is about cleaning more floor in the same time.
Three ways to make it actually clean
Controller #1 wanders. It will eventually touch most of a small room, but it crosses its own path constantly and leaves whole corners untouched. Real vacuum robots combine a handful of simple behaviours, and so should yours.
1. Random bounce — one line better than nothing
The cheapest upgrade: when you hit something, turn a random amount in a random direction. A fixed turn angle can trap the robot in a loop that retraces the same triangle for the rest of the match; randomness breaks that symmetry. It is still not a strategy, but as a fallback for when a smarter behaviour gets confused, it is excellent.
Patch for controller #1 — random escape turns
import random

turning = 0
direction = 1 # +1 = spin one way, -1 = the other

# ... inside the loop, replace the two turn branches with:

 if turning > 0:
 turning -= 1
 ls, rs = MAX_SPEED * direction, -MAX_SPEED * direction

 elif front > NEAR:
 turning = random.randint(10, 35) # 0.32 s .. 1.12 s of spinning
 direction = random.choice((-1, 1)) # a coin flip
 ls, rs = -MAX_SPEED * 0.4, -MAX_SPEED * 0.4
2. Wall following — the first behaviour that covers ground properly
Wall following means keeping a wall at a constant distance on one side and driving along it. Do it once around a room and you have cleaned the entire perimeter, including the corners that random bouncing never reaches. It also gives you a reliable way to move from room to room: follow the wall long enough and you eventually pass through every doorway.
The trick is not to think in if statements but in error: how far is the side sensor
from where I want it? Steer proportionally to that error. Too close, steer away a little; too far,
steer in a little. This is a proportional controller, the simplest and most useful idea in all
of control engineering, and it is four lines of Python.
Controller #2 — follow the wall on the right
# Wall following - hug the wall on the right at a steady distance.
TARGET = 30 # centimetres you want to keep on the right
GAIN = 0.8 # how hard the robot reacts to being off target
CRUISE = 20

if front < 35: # inside corner -> spin left, hard
 wheelleft, wheelright = -15, 15

else:
 error = (TARGET - frontright) * GAIN # positive = too close to the wall
 wheelleft = max(-25, min(25, CRUISE - error))
 wheelright = max(-25, min(25, CRUISE + error))
Tuning GAIN is the whole game. Too small and the robot drifts lazily away from the
wall and loses it. Too large and it snakes violently, over-correcting past the target every time —
the classic oscillation you can see instantly on screen. Start at the value above, then multiply or
divide it by two and watch what changes. Adjusting one constant at a time and observing the result
is robotics engineering; there is no shortcut around it.
One thing wall following cannot do is clean the middle of a room. Left alone it will circle the perimeter for the whole match and score poorly. It needs a partner.
3. Spiral — for the open middle of a room
A spiral is a circle whose radius grows a little every pass. Start it in an open space and it sweeps outward in tight rings, covering an area almost perfectly with no wasted crossings. It is the natural complement to wall following: one handles the edges, the other handles the middle.
Controller #3 — an expanding spiral
# The spiral - open circles that widen until something gets in the way.
GROWTH = 0.01 # how fast the circle opens up

if timer > 0: # bouncing away after a bump
 timer -= 1
 wheelleft, wheelright = -10, -10

elif front < 35: # the spiral ran into something
 inner = 0.15 # reset it, then bounce and re-spiral
 timer = 8

else:
 inner = min(1.0, inner + GROWTH) # every pass the circle opens a little
 wheelleft = 25
 wheelright = 25 * inner
Putting them together: a mode switch
None of the three behaviours is good enough alone. A competitive controller keeps all of them and switches between them — and the switching logic is just another counter:
The strategy skeleton
# One robot, three behaviours, switched on a clock.
# Remember: ten passes make one second.
SPIRAL, WALL, BOUNCE = 0, 1, 2

mode_steps += 1

if mode == SPIRAL:
 do_spiral()
 if mode_steps > 130: # ~13 s of spiralling is plenty
 mode, mode_steps = WALL, 0

elif mode == WALL:
 do_wall_follow()
 if mode_steps > 290: # ~29 s along the wall, then shake it up
 mode, mode_steps = BOUNCE, 0

else:
 do_random_bounce()
 if mode_steps > 100:
 mode, mode_steps = SPIRAL, 0
Those numbers are guesses, and they should be. Change them, run the match, look at the score, change them again. The teams that do well are the ones that ran fifty matches, not the ones that wrote the cleverest first draft.
U19 only: navigating with GPS
The U19 robot also carries a GPS, which reports its exact position in the house. That changes what is possible: instead of reacting to whatever is in front of you, you can decide to go to a specific place — the far corner, the room you have not visited, a charging pad.
Driving to a point needs two numbers: the direction from here to the target, and the direction you are currently facing. The difference between them is your steering error. The one piece of real maths on this page is how you subtract two angles safely.
Why angles cannot just be subtracted
Suppose you are facing 350° and the target is at 10°. Plain subtraction gives 340°, so a naive robot
turns almost all the way around — when the answer is a 20° nudge to the right. The fix is a
one-line classic: convert the difference into a sine and a cosine and let
atan2 turn it back. The result is always the shortest way round, between −π and +π,
and it never breaks at the wrap-around point.
Controller #4 — drive to a coordinate (U19)
# U19 only: the robot knows where it is (x, y) and which way it faces.
# The app can drive there for you - or you can steer it yourself.

# --- the easy way: hand the job to the app ---------------------
goto(gx, gy) # start driving towards that point
if atgoal == 1: # becomes 1 once the robot has arrived
 stopgoto()

# --- the hand-written way, if you want to own the steering -----
# distto(gx, gy) distance to the point, in centimetres
# angleto(gx, gy) the turn you still need, -180..180 degrees
# (positive = the goal is to your left)

turn = angleto(gx, gy)

if distto(gx, gy) < 15: # arrived
 wheelleft, wheelright = 0, 0
elif turn > 12: # goal is to the left -> spin left
 wheelleft, wheelright = -12, 12
elif turn < -12: # goal is to the right -> spin right
 wheelleft, wheelright = 12, -12
else: # lined up -> drive at it
 wheelleft, wheelright = 25, 25
A warning that costs teams matches: drive_to follows the straight line and nothing
else. It does not know that a sofa is in the way. Always keep your obstacle check running above
it — if the front sensors light up, abandon the trip, escape, and re-issue it on the next pass.
Navigation and obstacle avoidance are two different jobs and both have to be on duty.
Check whether your GPS returns metres in the order you expect before trusting the numbers; print
gps.getValues() and walk the robot to a known corner. In U19 the house map is fixed and only
the objects move between rounds, so a set of hard-coded waypoints is legitimate — but a controller
that only follows waypoints and ignores its sensors will spend the match pushing a chair.
U19 only: battery and the charging pads
The U19 robot runs on a battery, and the green zones on the floor are wireless charging pads. This turns the match into a resource-management problem: every second spent charging is a second not spent cleaning, but a flat battery ends your match early and costs you everything after that moment.
Watching the battery and heading for the nearest pad
# U19 only: the battery drains as you drive and refills on the pad.
# battery is a percentage, 0..100. dockx / docky are the pad's coordinates.
LOW = 25 # go and charge below 25%

if battery < LOW:
 goto(dockx, docky) # charging beats cleaning right now
elif atgoal == 1 and battery > 90:
 stopgoto() # topped up - back to work
 clean()
else:
 clean() # your normal cleaning behaviour
Two habits separate a good energy strategy from a bad one. First, go early — the trip to the pad itself costs energy, and running out halfway there is the worst outcome available. Second, do not charge to full out of habit. If the match is nearly over, the charge will never be spent; stay out and keep cleaning. Reading the remaining match time and comparing it to the trip cost is exactly the sort of judgement that wins a close round.
What the score actually rewards
Read this section before you optimise anything, because it decides what "better" even means. Scoring is based on cleanliness: the coverage of floor tiles and the cleaning level reached within the match time. Some consequences follow directly:
- Distance travelled is worth nothing. A robot sprinting back and forth across the same corridor scores like a robot that stood still. Only new floor counts.
- Coverage is a search problem, not a speed problem. The question is not "how fast can I drive" but "how do I guarantee I visit every part of the house once". Systematic beats fast.
- The map changes every round. A path hard-coded for one house is worthless on the next one. (In U19 the house is fixed and the objects move — same lesson, smaller dose.) Test your controller on more than one world before you believe your score.
- Getting stuck is catastrophic. A robot wedged under a chair for the last ninety seconds loses far more points than a slightly clumsy one that keeps moving. Build an escape: if the position or the sensor readings barely change for several seconds, reverse and turn hard, no questions asked.
- The clock is a resource. Sweep the open floor first while it is cheap, and leave the fiddly corners for later. A tidy plan that finishes beats a perfect plan that runs out of time.
A useful mental target is the lawnmower pattern: long parallel passes across a room, each one shifted over by the width of the robot. It is what humans do instinctively when they vacuum, and it is close to optimal coverage. You can approximate it with the IMU alone: drive on a fixed heading until a wall, turn 90°, drive a short hop, turn 90° the same way again, and repeat.
Play fair while you do it. The rules require original code — no plagiarism — and the organisers' decisions are final. Borrowing an idea from this page is exactly what it is here for; submitting someone else's controller is not.
Debugging: print, watch, change one thing
You cannot step through a robot with a debugger, because the world does not pause politely while you think. The tool that replaces it is the print line — one compact status line, printed a few times a second, that tells you what the robot believes right now:
The one print line worth keeping
if step % 10 == 0:
 print("F", round(front), " L", round(left_side), " R", round(right_side),
 " mode", mode, " turning", turning)
Then work like this:
- Watch the numbers, not the robot. When something goes wrong, the console usually already
says why. If
frontwas 1200 while the robot happily drove into a wall, yourNEARconstant is wrong — not your logic. - Print sparingly. Thirty lines a second is unreadable noise;
step % 10gives you about three, which a human eye can actually follow. - Change one constant at a time. Change two and you will not know which one helped. Write the old value in a comment before you change it.
- Slow the match down. The app runs at 1x, 2x, 4x or 8x — drop it to 1x and watch. A behaviour that looks like random twitching at full speed is often obvious at quarter speed.
- Reproduce, then fix. If the robot gets stuck in one particular corner, put it back in that corner and watch the numbers there instead of guessing from memory.
The mistakes everyone makes
| Symptom | Usual cause |
|---|---|
| The robot does not move at all | You never set wheelleft and wheelright, or an error stopped the file before it reached them — check the red error line under the code box |
| A branch never fires | Your threshold is wrong. Open the Sensors panel and read what the sensor really says at the moment you want the branch to fire |
| The robot freezes | A while loop or a sleep() inside your file. It must run to the end so the app can call it again |
| The robot vibrates against a wall | The "am I already turning?" branch is not first, so the turn restarts every pass |
| It turns roughly the right amount — sometimes | You are counting time instead of reading the IMU. Timed turns drift as soon as speed or friction changes |
| It wobbles down a corridor | Your wall-following GAIN is too high — halve it |
| It works on one map and fails on the next | Constants tuned to one house, or a hard-coded path. The map changes every round |
| Edits to the file do nothing | You did not load the edited file again before pressing Start |
| Great score in practice, poor score in the match | Only ever tested from the same starting position and starting angle |
Practise the same ideas with zero install
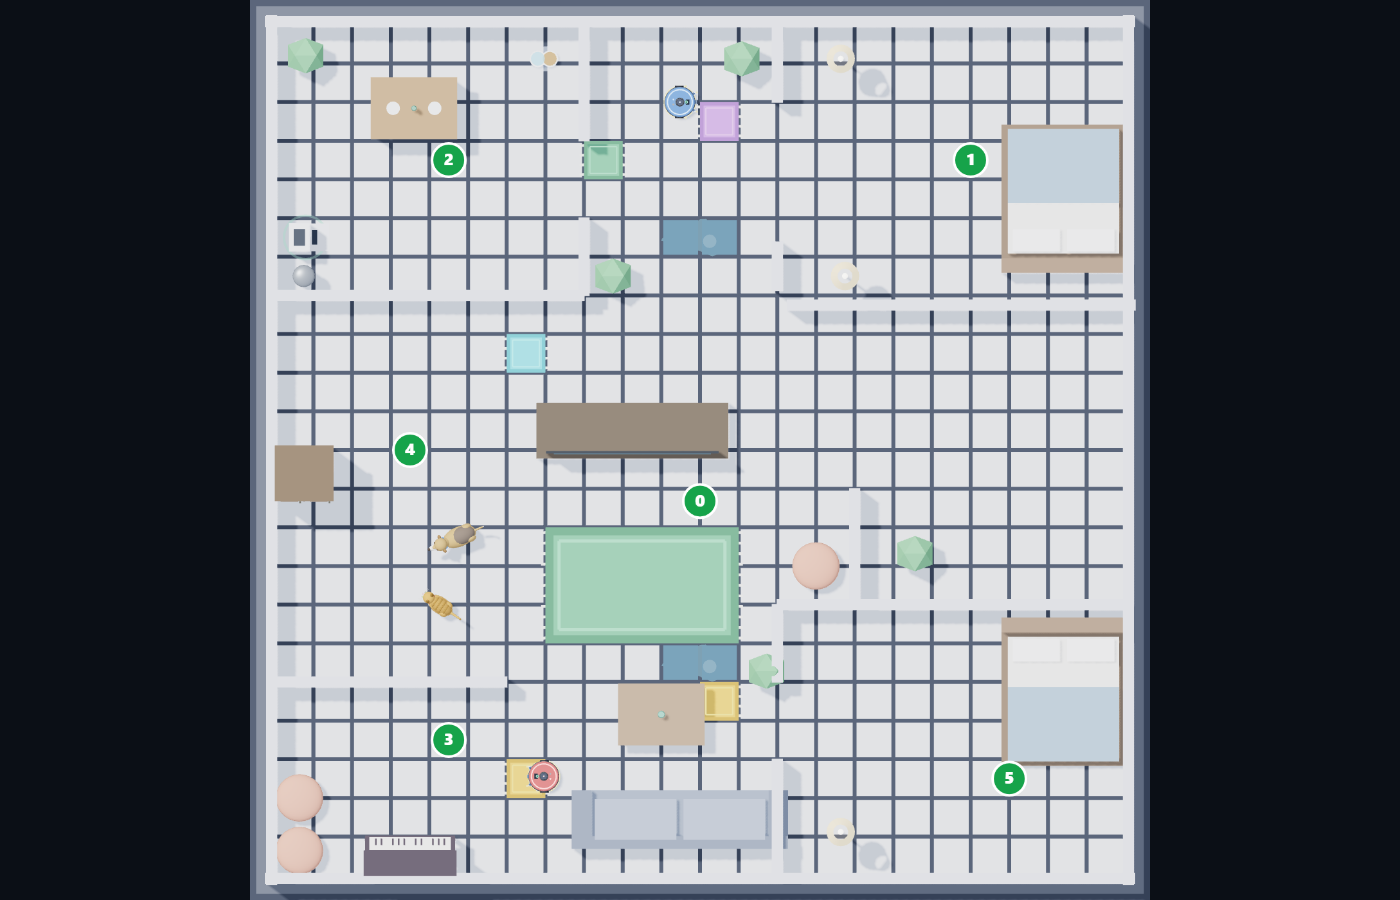
If you want to feel a control loop before anything is even downloaded — or you are teaching a class and cannot install software on school machines — the same competition also opens in the browser. It runs entirely in a web page: two robots, real distance sensors, a colour sensor that tells you whether the floor ahead is already cleaned, and the same "read the sensors, set the wheels" loop written in Python.
Everything you learned above transfers directly. The if timer > 0: block in the game is
the same counter pattern as turning in controller #1; wall following, spiralling and random
bouncing all work there too — it is the same house, the same robot and the same Python, so it is
the fastest possible way to build intuition.
Open the competition in your browser The competition house, division by division
Building your own map in the editor is an underrated way to test a controller. Design a house with a nasty narrow corridor, a cluster of chair legs and a dead-end room, and you will find the weaknesses of your algorithm in minutes instead of discovering them on competition day.
Frequently asked questions
Which programming language do I use for the vacuum robot?
Python. The sample controllers in the project ZIP — examples/robot_code_u14.py, robot_code_fs.py and robot_code_u19.py — are plain Python files, and the whole competition can be done with variables, if statements, loops and functions. In the U19 division more advanced languages are also allowed.
How much Python do I need to know before I start?
Variables, if/elif/else, while loops, lists and functions are enough for a competitive controller. No classes, no decorators, no external maths library. Almost every beginner controller is fewer than eighty lines.
Why can my robot not use time.sleep to wait?
Your file runs once and ends; the app calls it again ten times a second. Sleeping or looping inside it freezes the robot with the wheels stuck at their old speeds. Store a counter like timer = 20 and count it down one per pass instead.
How do I turn by an exact number of degrees?
Do not count time — read the IMU. Record the yaw before the turn, then keep spinning until the shortest angular difference to your target is small. Compute that difference with atan2(sin(target - actual), cos(target - actual)) so it stays correct across the wrap-around point.
How is the score calculated?
Cleanliness: floor-tile coverage and the cleaning level reached within the match time. Distance travelled counts for nothing on its own, so an algorithm that keeps recrossing floor it already cleaned scores badly. See the league overview for the full picture, and the published awards and match results for what real scores looked like.
Can I practise the same ideas without installing anything?
Yes. The same competition opens in the browser on this site and uses the same mental model: distance sensors in, wheel speeds out, one pass per moment. It is the fastest way to feel how a control loop behaves.
Where do I get the sample code and the worlds?
From the install guide, or straight from the quick start section.
Where do I ask when I am stuck?
The league Telegram channel t.me/firasmarthome and the Discord server. The official league site smarthomerobot.ir also hosts a knowledge base.
Where to go next
You now have the whole picture: the loop, the sensors, four working controllers and a way to think about the score. The next move is not to read more — it is to open the app, break controller #1 on purpose, and find out what each number does.
- Not installed yet? The install guide covers the install, the project ZIP and the very first run, step by step.
- Check what actually scores. The full competition rules and the league guide tell you exactly what the judges measure.
- Teacher, coach or parent? The schools and coaches guide explains how to run the league in a classroom or a robotics club.
The league’s awards and match results are published. Use them as a benchmark: run your controller on the same worlds and see where you would have landed.
Download the tools and start What the vacuum robot league is Practise in the browser نسخهی فارسی